A folder of geotagged photos can be sorted by where each photo was taken. Draw an area on a map, and the photos taken inside it are picked out.
Select photos inside an area
- Open Select Photos by Area.
- Drop in your photos, or choose a whole folder. Each photo with a location appears on the map.
- Choose Draw a rectangle and click two opposite corners on the map. For another shape, choose Draw a shape, click each corner and finish the shape.
- The photos inside are filled in on the map and marked in the table.
- Download the photos inside, or download the list as a CSV file.
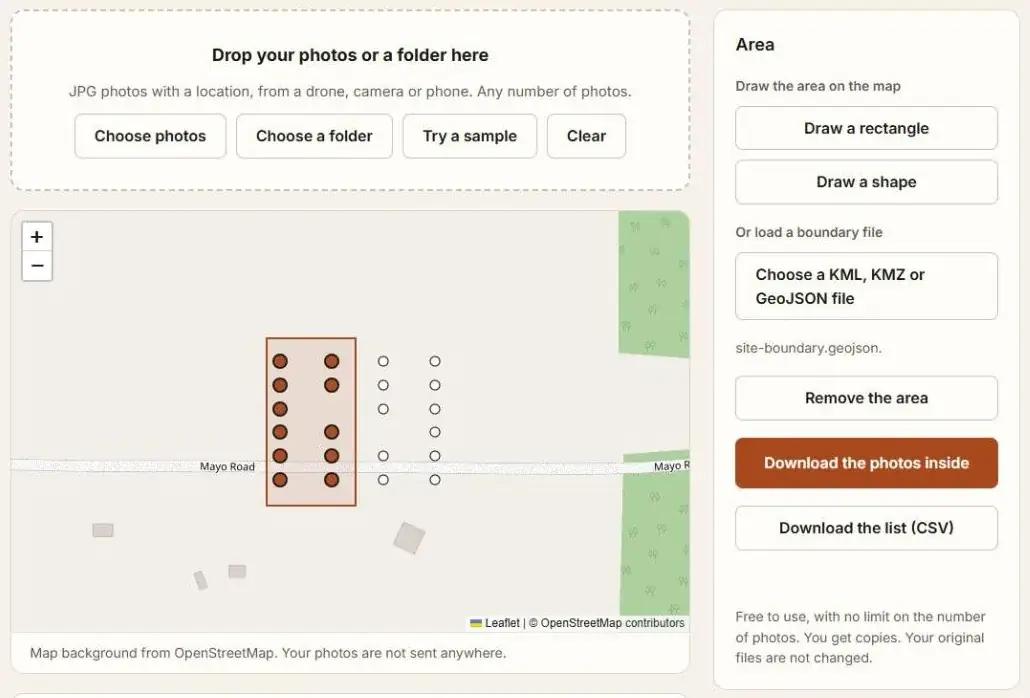
The photos stay on your device. You get copies of the selected photos. The original files are not changed or moved.
Use a boundary file
If the area already exists as a file, load it instead of drawing. The tool reads KML and KMZ files from Google Earth and GeoJSON files from mapping software. It uses the polygons in the file. A file can hold more than one, and a photo is selected when it is inside any of them.
To make such a file, see How to Draw a KML Boundary in Google Earth.
How a photo is placed
By the GPS position saved in it, which is where the camera was. A photo is inside when that position is inside the area. For a drone photo taken straight down, that is the middle of the picture.
What you can download
| Download | What it is |
|---|---|
| The photos inside | Copies of the selected photos, in one zip file. A very large selection is saved into a folder you choose, in Chrome and Edge on a computer. |
| The list | A CSV file with the file name, latitude, longitude, altitude, date and camera of each selected photo. |
Questions
What about photos with no location?
They are listed, and they are never selected. To see why a photo has none, read How to Extract GPS Coordinates from Photos.
Can I select the photos outside the area?
Not directly. Draw the area around the photos you want.
Which photos does it work with?
JPG files with a GPS position, from a drone, camera or phone.